I started using Vim a while ago with the great distribution Janus. Since then I made a a lot of changes to my config, but it never felt entirely like my own setup. There always were a few plugins I wouldn’t use and some features I couldn’t get to work because I didn’t understand the internals of my distribution.
Because of this I decided to entirely drop the setup I’ve been working with for the past years and started from scratch, adding only what I needed. If you want to see the result, my .vim is available on Github.
Overall I found the experience to be way more easy and fun than expected, so I decided to share! In this article I’ll explain how to quickly setup and customise Vim without having to use a pre-made distribution, just Git and a Terminal.
Disclaimer: All the choices made here reflect my opinion, the way I use Vim and the tools and languages I generally use. Obviously if you’re using an ergodox and only code in Flow-Matic we will have very different opinions on what is best.
.jpg)
Basic Setup
First of all you need to install vim, or, if you don’t like to run your text editor in your console and use a mac, you can install MacVim.
Out of the box, Vim is very hard on the eyes and doesn’t have a lot of feature we’ve come to expect from other editors like Sublime or Atom. However, it’s more evolutive and customisable, so the first thing to do is to start setting it up to fit your preferred way of coding. I recommend versioning your configuration to share across machines while keeping track of any changes you made.
To do this, create a .vim repository with a vimrc file that will contain most of your configuration:
$ cd ~
$ mkdir .vim
$ cd .vim
$ touch vimrc
$ git init .
Now you need to go back to your home directory and symlink the vimrc file. This way you get to use your .vimrc file normally while still get all the advantages of versioning with Git.
$ ln -s ~/.vim/vimrc ~/.vimrc
Getting Vim To Look Nice
Picking a Theme
There are a LOT of themes available for Vim. I’ve used Solarized for quite a while, but recently I switched to the Tomorrow Night theme and I like it a lot.
If you don’t like this one, don’t worry: there are tons out there. Just Google “Vim Themes” and browse around.
Once you found you favorite one, add it to your project by first creating a folder to store it:
$ mkdir ~/.vim/colors
Add the theme’s .vim file to this folder. Once this is done, edit your .vimrc file and add these lines to let Vim know that you want syntax highlighting based on file names:
filetype on
syntax on
colorscheme Tomorrow-Night
Setting Fonts
Once you have your main theme, time to pick a font! I like my fonts readable, simple and big. So I went with Menlo Regular 18pts.

To use this, download and install the font and then add this line to your .vimrc
set guifont=Menlo\ Regular:h18
Other Details
To get Vim to open with a given size, add this to your .vimrc:
set lines=35 columns=150
Add a colored column at 90 to avoid going to far to the right:
set colorcolumn=90
I’m not quite sure why this isn’t by default, but here’s how to add line numbering:
set number
More Customisation
Now that your Vim starts to look better, let’s start to improve how it actually functions. The great thing with Vim is that we can get it to do whatever we want… it might be overwhelming at first, but it’s really not that hard.
Leader Key
Before doing anything else, we need to set a Leader key.
The Leader key is Vim’s way to reduce conflicts in configuration. The Vim user can set this key to be anything and then every command are going to be preceded by this key. By default it’s set to be backslash, but I like to change it to space.
let mapleader=" "
Reload Vim Config Without Having To Restart Editor
Every time you edit your .vimrc file, if you want to see the changes you have to close & open it again or source the .vimrc file manually. It’s a pain, so let’s map some keys to do it automatically:
map <leader>s :source ~/.vimrc<CR>
It’s the first time we see this syntax and it might look a bit weird. Basically it declares “please map (Leader key + s) to the following command: :source ~/.vimrc and then press Enter” which effectively reload the Vim configuration. Once I add this to my configuration, pressing the leader key followed by s will run the command above.
Note that it only works for .vimrc changes and not for adding or removing plugins.
Smart Defaults
Vim is pretty old and made to run on machines with low processing power. Because of this, when you install Vim a lot of interesting features are deactivated by default. Here’s what most people would want their 2016 text editor to have.
Keep more info in memory to speed things up:
set hidden
set history=100
Have some logic when indenting:
filetype indent on
set nowrap
set tabstop=2
set shiftwidth=2
set expandtab
set smartindent
set autoindent
Note that this particular config is made for myself and I mostly use Ruby which uses 2 spaces as tabs.
Dealing With Whitespaces
Here’s a handy command to remove whitespaces on save.
autocmd BufWritePre * :%s/\s\+$//e
Better Search
When running a search, get Vim to highlight found words:
set hlsearch
Ability to cancel a search with Escape:
nnoremap <silent> <Esc> :nohlsearch<Bar>:echo<CR>
Use Arrows
People are divided on this, but I have made my mind and I prefer using arrow keys instead of the default Vim mapping. If you want to do the same:
map <D-A-RIGHT> <C-w>l
map <D-A-LEFT> <C-w>h
map <D-A-DOWN> <C-w><C-w>
map <D-A-UP> <C-w>W
Re-Open Previously Opened File
I find myself using this literally all the time. It’s basically cd - for your current window and allows you to quickly move back and forth between two files by pressing the Leader key twice.
nnoremap <Leader><Leader> :e#<CR>
Note that there’s already a way of doing it by pressing Ctrl + ^, but I like <Leader><Leader> a lot more.
Show Matching Parenthesis
When selecting a parenthesis it will highlight the one matching:
set showmatch
Plugins
Plugins are what make Vim great. There is a plugin for everything you might need, so being able to add and remove them easily is important.
Loading Plugins With Pathogen
Pathogen is, in my opinion, the best way to manage plugins currently available. It’s very simple, non obtrusive and really “just works”.
To install it, you can simply use the one liner below. If you don’t feel like copy and pasting curl commands, just look up their very clear documentation.
mkdir -p ~/.vim/autoload ~/.vim/bundle && \
curl -LSso ~/.vim/autoload/pathogen.vim https://tpo.pe/pathogen.vim
Now open your .vimrc and add this line at the top:
execute pathogen#infect()
From now on, you can add plugins in ~.vim/bundle/ and they will get loaded automatically!
Managing Plugins With Git
All the Vim plugins I’m going to mention here have a Git repository somewhere. This is great, because updating to the latest version can become as easy as pulling master.
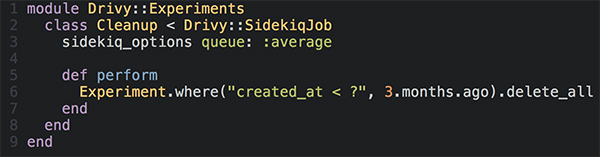
To do this we’re going to use git submodules to reference another repository from our main repository. It’s actually pretty straightforward and will look like this on Github:

For every plugin, you need to run:
$ cd ~/.vim
$ git submodule add git@source/pluginname.git bundle/pluginname
For instance if you want to add vim-ruby located at https://github.com/vim-ruby/vim-ruby, you’ll do:
$ git submodule add git@github.com:vim-ruby/vim-ruby.git bundle/vim-ruby
Later on when you use your config on another machine or want to update your plugins, you’ll be able to use other commands like git submodule init or git submodule update.
Vim Plugins I Used
Here is a list of all the plugins I decided to include and why. I also added the advanced configuration I used and some examples when needed. This list is, of course, very subjective and will depend on what you expect your editor to do for you, but I feel like it’s a good starting point.
Command-T
Very fast fuzzy search to open files quickly without many keystrokes. Get it here.
To ignore some files, you can use wildignore:
set wildignore+=*.log,*.sql,*.cache
When you create a new file, it’s not indexed by default. Here a way to reindex everything by simply pressing <Leader>+r:
noremap <Leader>r :CommandTFlush<CR>
NerdCommenter
Comment / Uncomment large blocks of code easily. Get it here.
Lightline
After trying different plugins such as Airline, I decided on Lightline. This plugin gives you a light a configurable status line without too many pre-made decisions. Get it here.

NerdTree
A simple yet very useful tree explorer. Note that this is a project drawer and because of this has some limits when working with splits as explained in this article, however it fits the way I work and is an easy transition for anyone using an editor like Sublime or Textmate. Get it here.

Hit the right arrow to open a node:
let NERDTreeMapActivateNode='<right>'
Display hidden files:
let NERDTreeShowHidden=1
Toggle display of the tree with <Leader> + n:
nmap <leader>n :NERDTreeToggle<CR>
Locate the focused file in the tree with <Leader> + j:
nmap <leader>j :NERDTreeFind<CR>
Always open the tree when booting Vim, but don’t focus it:
autocmd VimEnter * NERDTree
autocmd VimEnter * wincmd p
Do not display some useless files in the tree:
let NERDTreeIgnore=['\.DS_Store', '\~$', '\.swp']
Supertab
Autocomplete when using tab. Get it here.
Fugitive
Git wrapper that I mostly use for its useful :Gblame feature, allowing you to blame any line directly from Vim. Get it here.
Git Gutter
Displays the diff in the gutter and allows you to do actions on it. I use it to see what I’ve just modified, but some some of its more advanced functions are also very good. For instance you can preview a change with <Leader> + hp and revert any change on a line with <Leader> + hr. It’s great! Get it here.

I don’t like my editor changing size while I’m using it, so I chose to always display the gutter - even when there are no changes.
let g:gitgutter_sign_column_always=1
Vim Multiple Cursors
The only feature in Sublime I was jealous of was its great multi cursor support. With this plugin I don’t have to feel this way anymore! Get it here.
Of course if you wanted to, you could have the same feature with native Vim features, but for now this plugin is really helpful to me.
Ruby Specific Plugins
I mostly use Ruby and Ruby on Rails for my projects, so I also added some plugins to help me with that.
Bundler.vim
I mostly use it to get better highlighting in the Gemfile, but it also allows you to bundle open quickly. Get it here.
Endwise
Adds an end keyword when needed. Get it here.
Vim-Rails
Must have plugin for anyone using Rails. It just does so much it would be a shame. I particularly like how it allows you to jump from file to file with ease. You can really go from a controller to its spec, to its views and so on. Get it here.
Vim-Ruby
Main plugin for dealing with Ruby. Get it here.
Missed One?
If you have plugins you feel belong here, feel free to share them in the comments or on twitter!
Since you scrolled this far, you might be interested in some other things I wrote: